IOX Simulator · Desktop app for Windows
Test your KNX project before you install it.
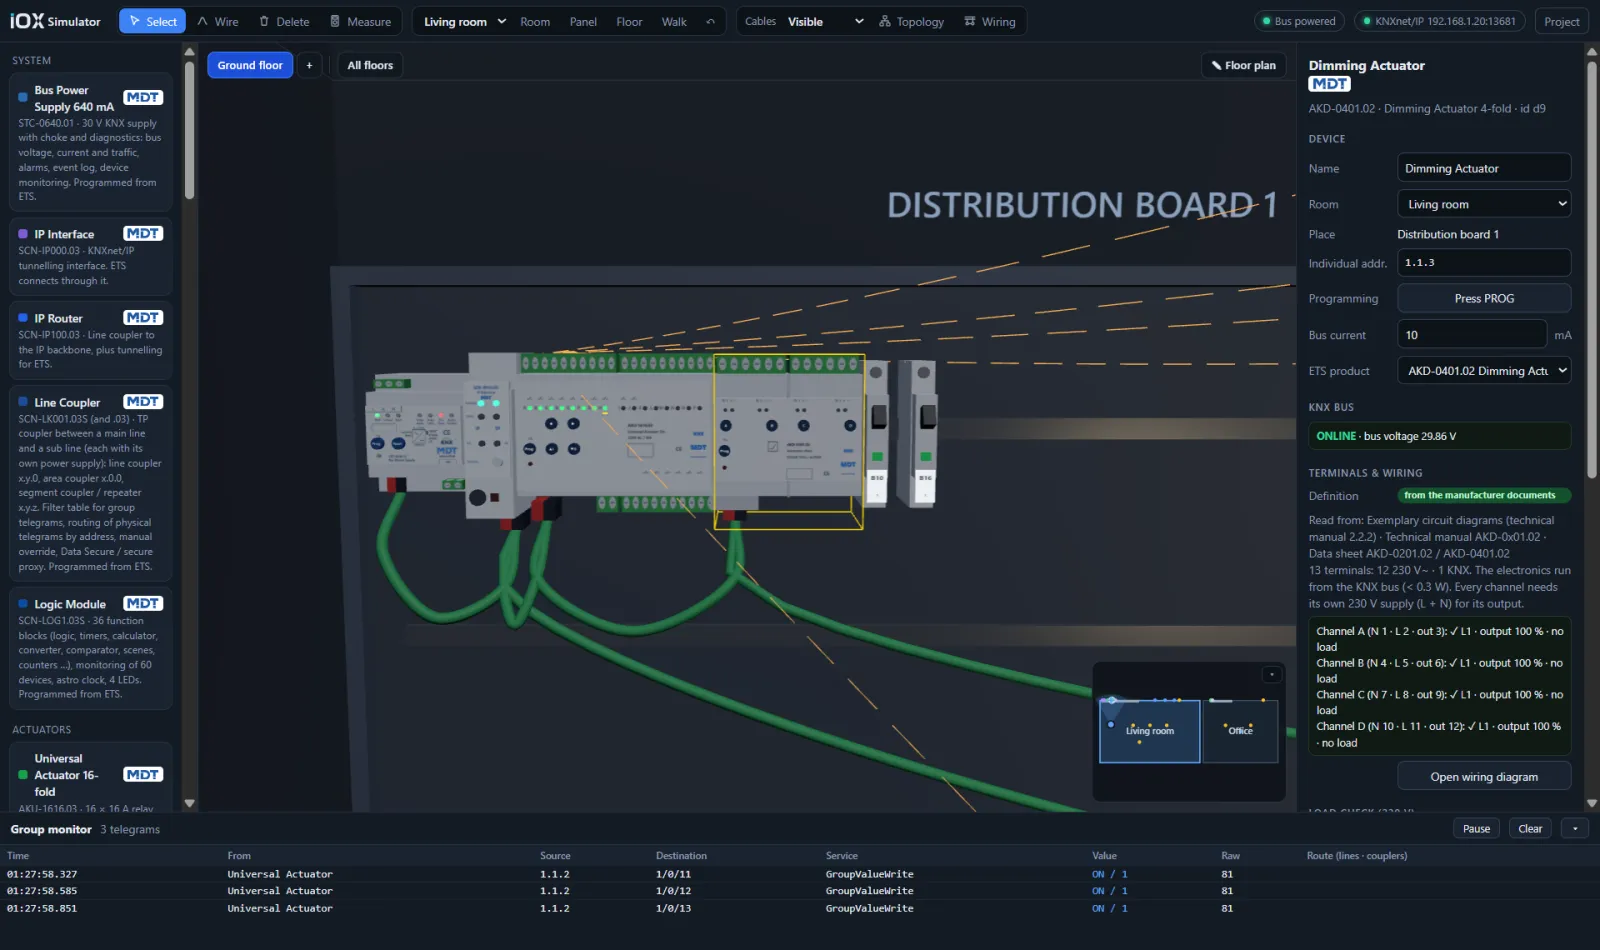
Build rooms and floors, place MDT KNX devices and 230 V loads, and wire them as you would in the panel. Then connect ETS: it sees the simulator as a KNXnet/IP interface, programs the devices, and they behave like the hardware.
Licence · Price on request
What it is
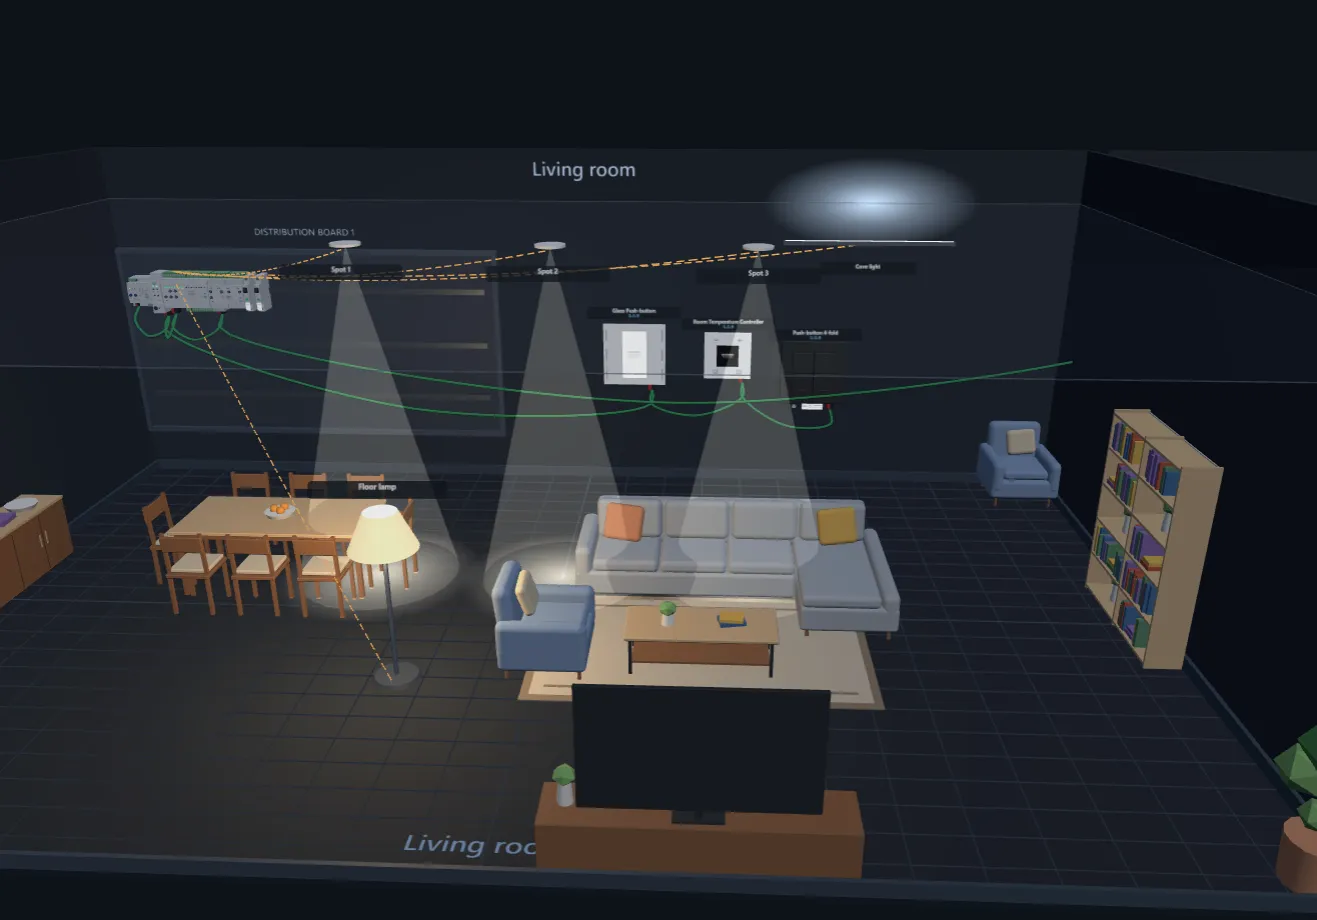
The whole installation, in one window.
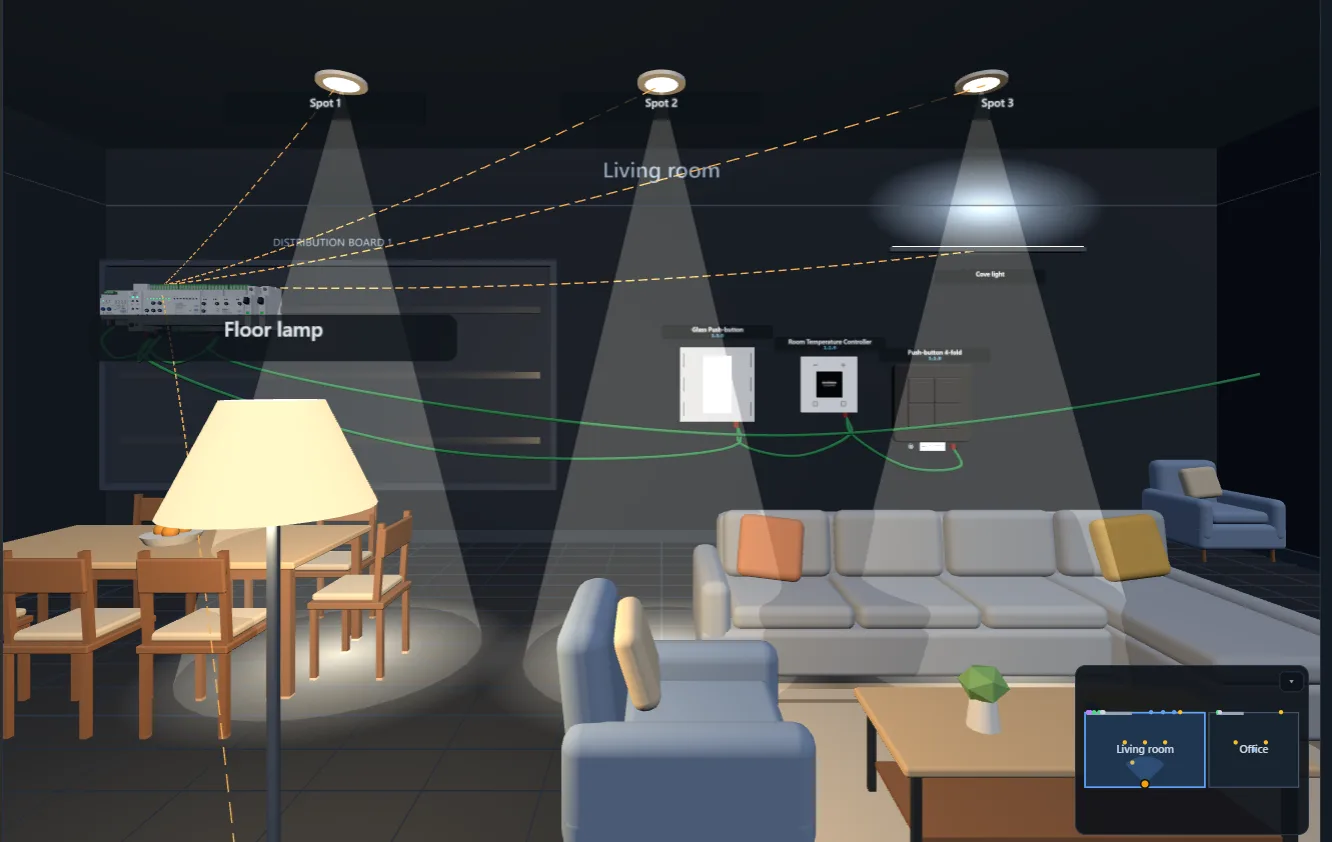
A real KNXnet/IP interface on one side, a building that reacts on the other. Press a push-button and the actuator switches, the lamp lights up and the telegram appears in the group monitor.
Connect ETS
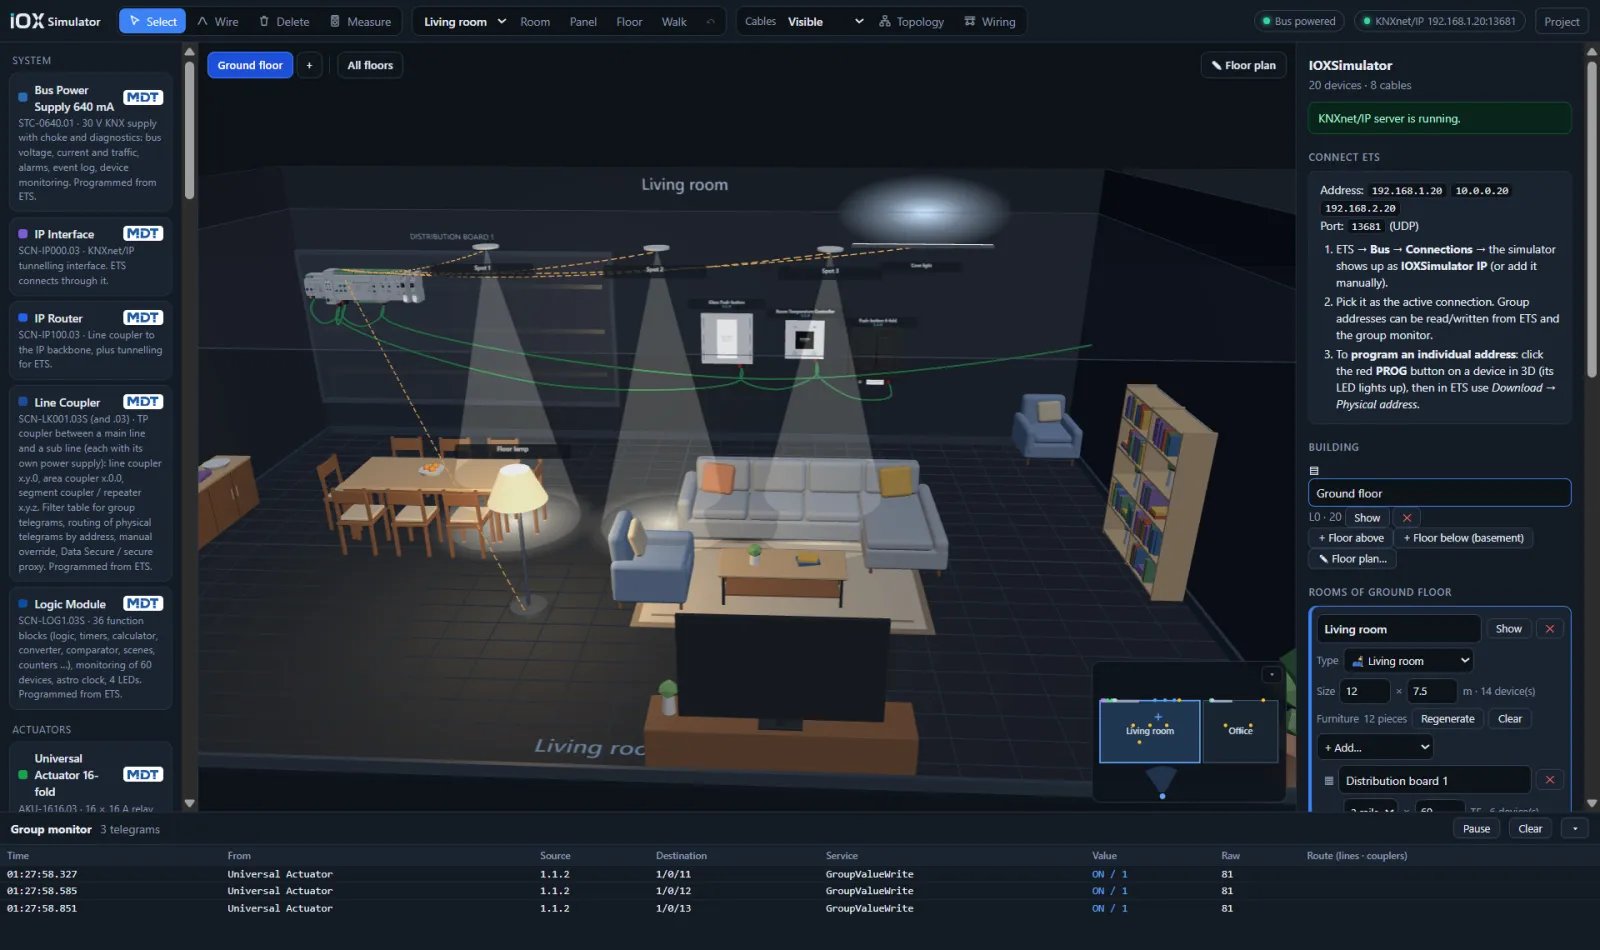
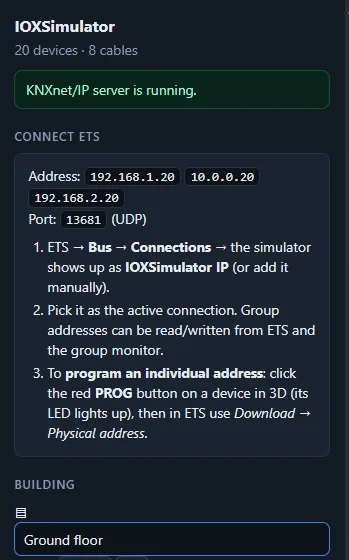
ETS sees a real KNXnet/IP interface.
Pick IOX Simulator as the connection in ETS and commission it the way you would on site — no interface, no power supply, no devices on the bench.
- Discovery, tunnelling with up to 8 connections, and routing (multicast)
- Press the red PROG button in 3D, then download the individual address from ETS
- Application download for devices whose ETS product database is imported
- Group value read and write from ETS and the built-in group monitor

Real MDT devices
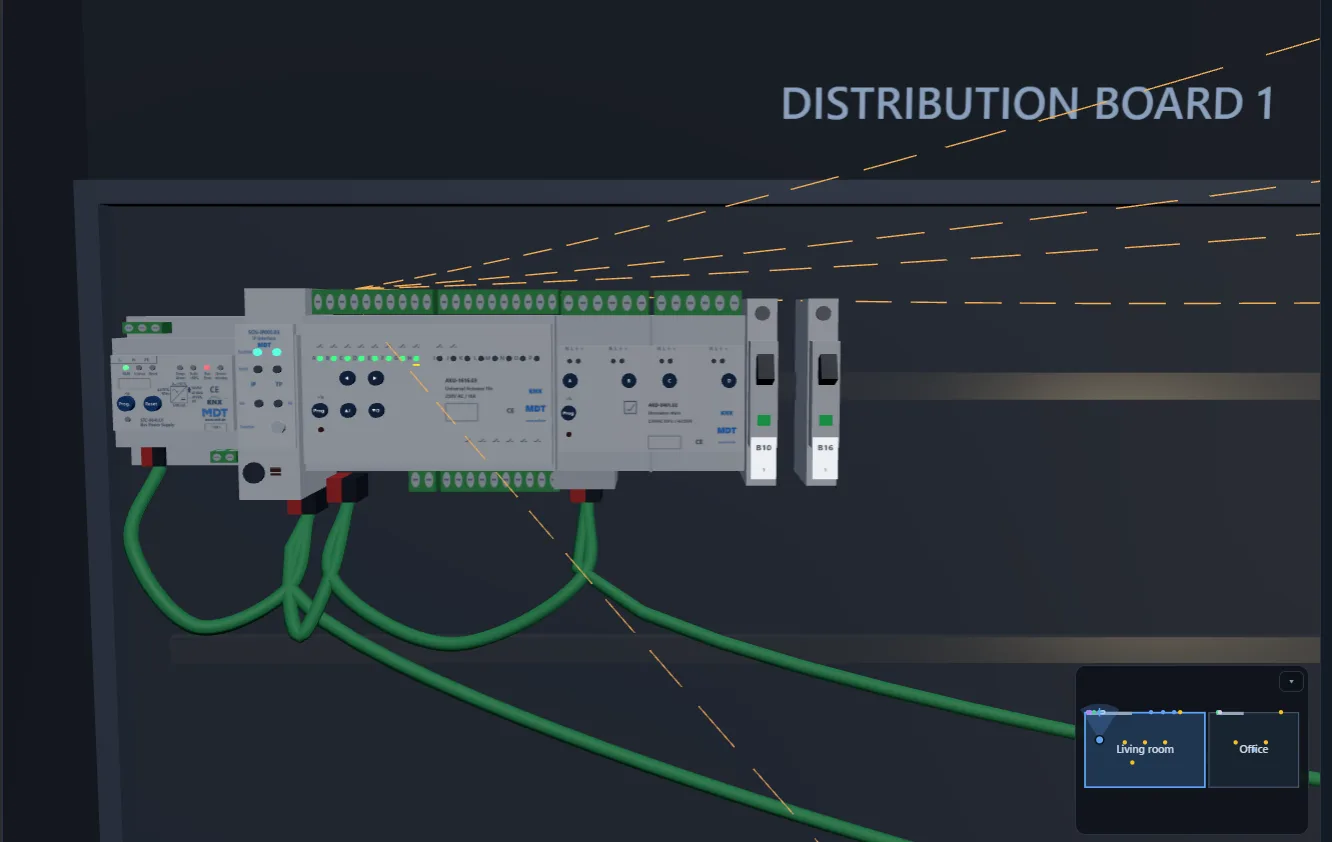
Modelled in detail, down to the terminals.
Power supply, IP interface, actuators, push-buttons, room controller and presence detector — each simulated from its ETS application and technical manual, with LEDs, buttons and terminals where they are on the real device.
- Individual address, PROG button and bus current on every device
- Live KNX bus voltage and per-channel 230 V status
- Terminals and wiring read from the manufacturer's documents
Wiring and physics
Wire it like the panel. Find the fault like on site.
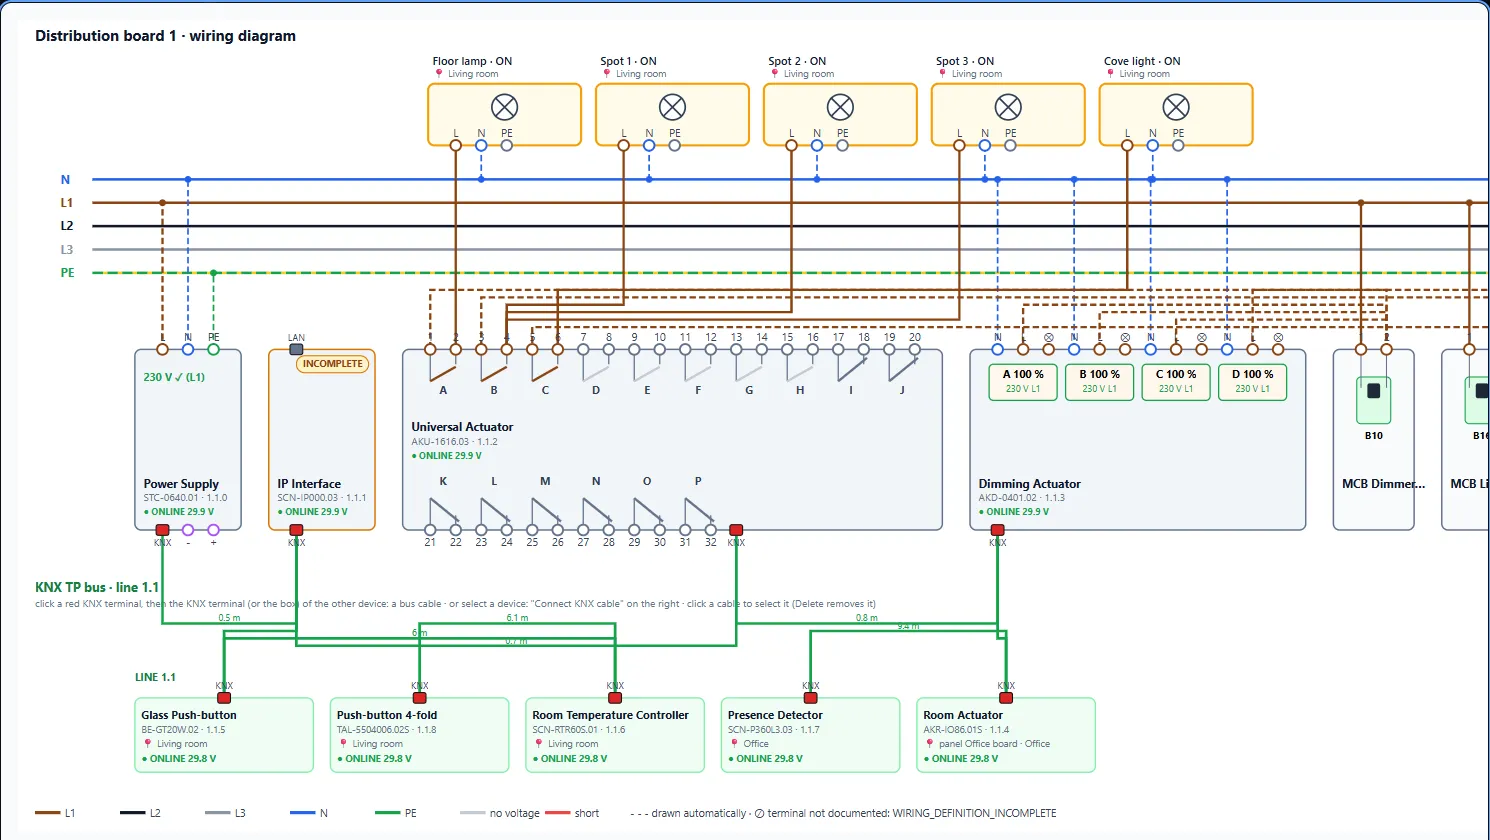
The 230 V side follows the manufacturers' terminal diagrams, and the bus cable is a physical component. Mistakes show up the way they would in the building.
- Overloads, wrong load types and short circuits raise alarms and trip breakers
- Cable length, resistance and voltage drop — devices drop out on low voltage
- Open, shorted and intermittent bus faults to find in training
- Bus and 230 V cables in separate conduits and trunking, as on site
Build and show
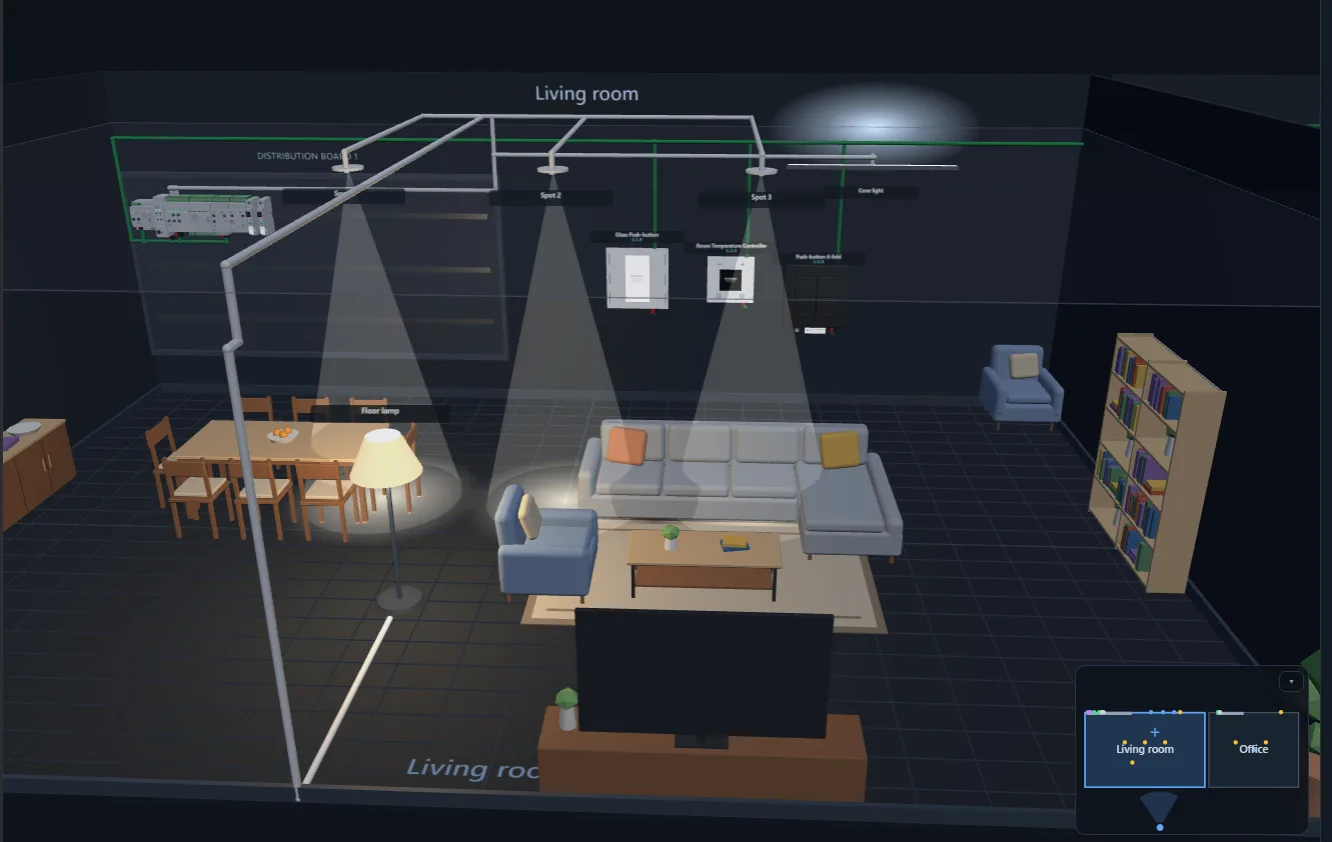
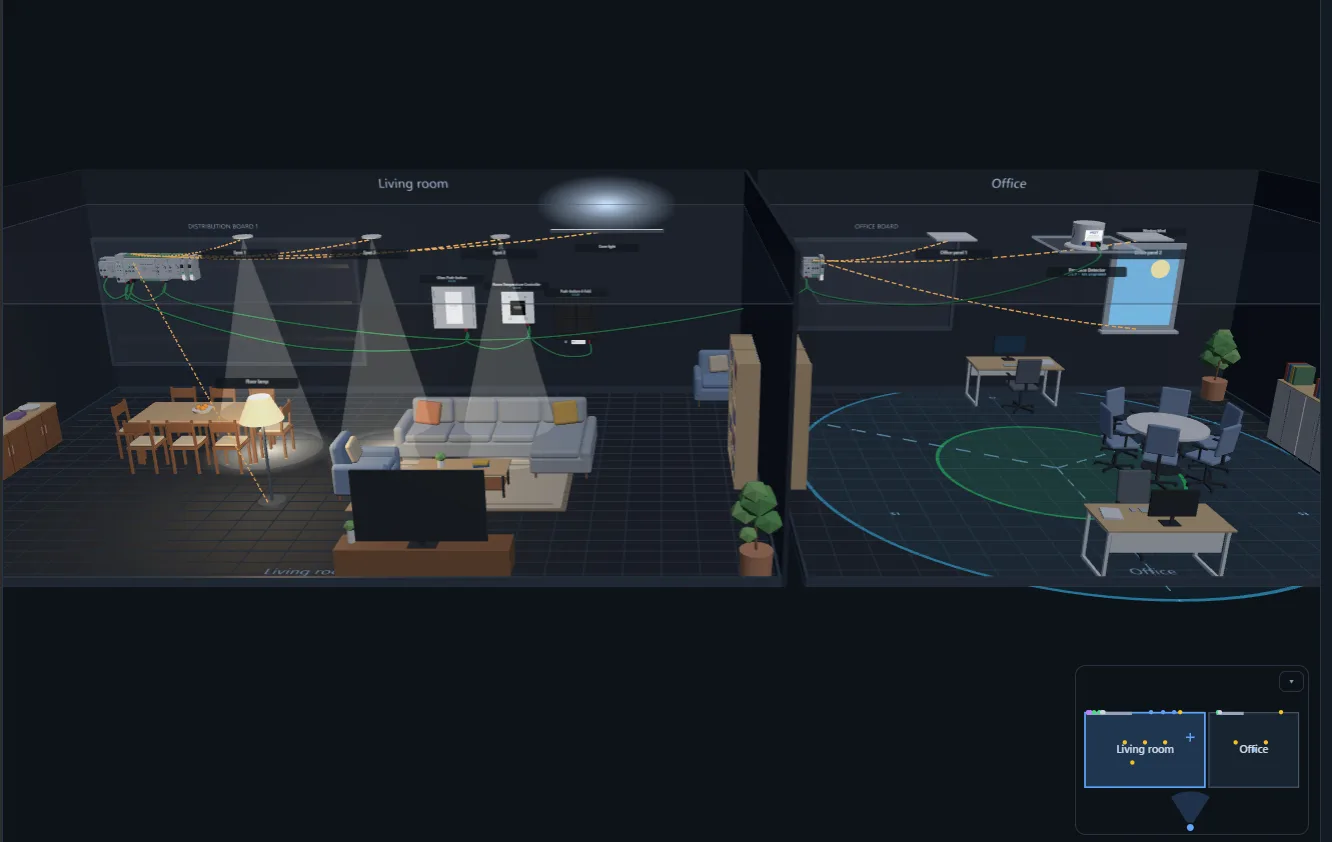
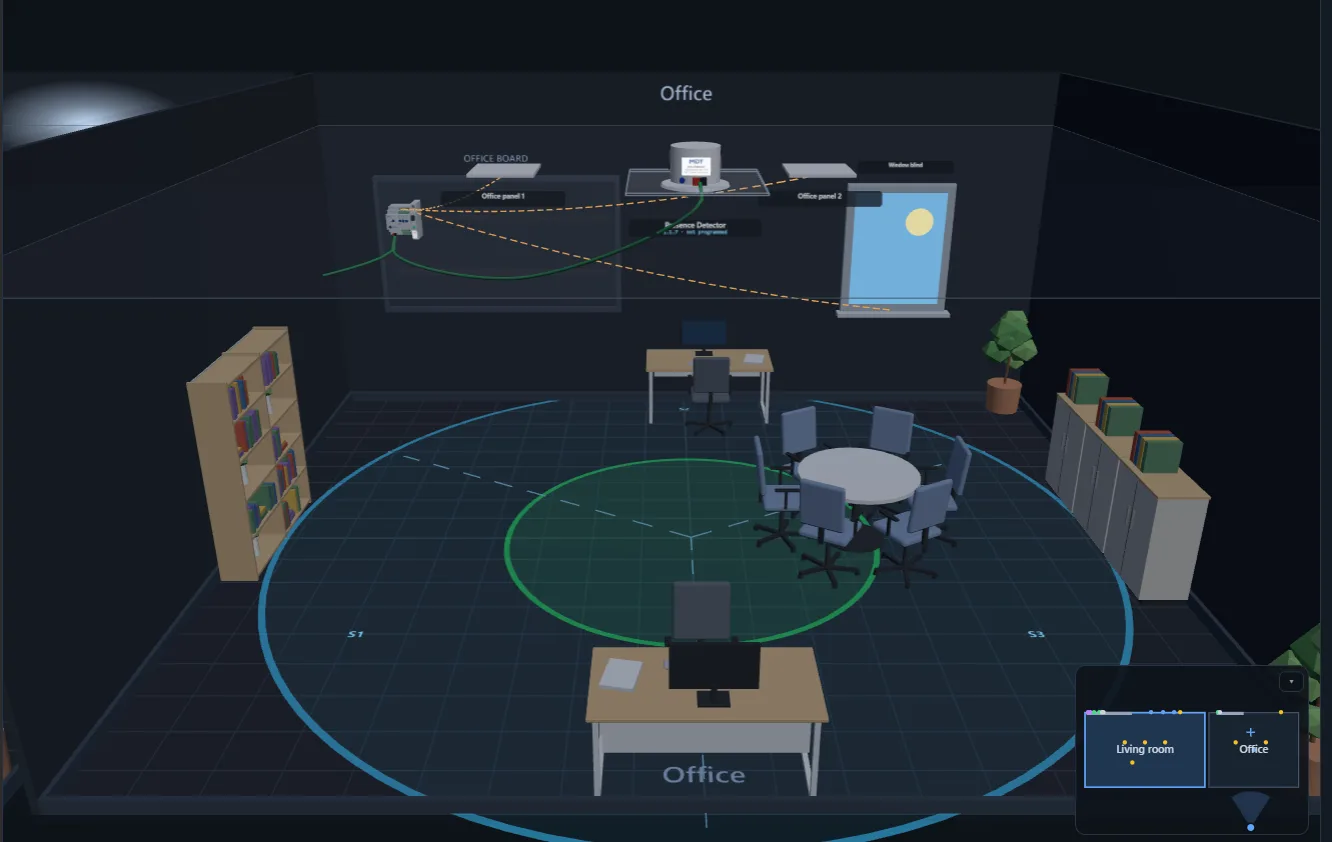
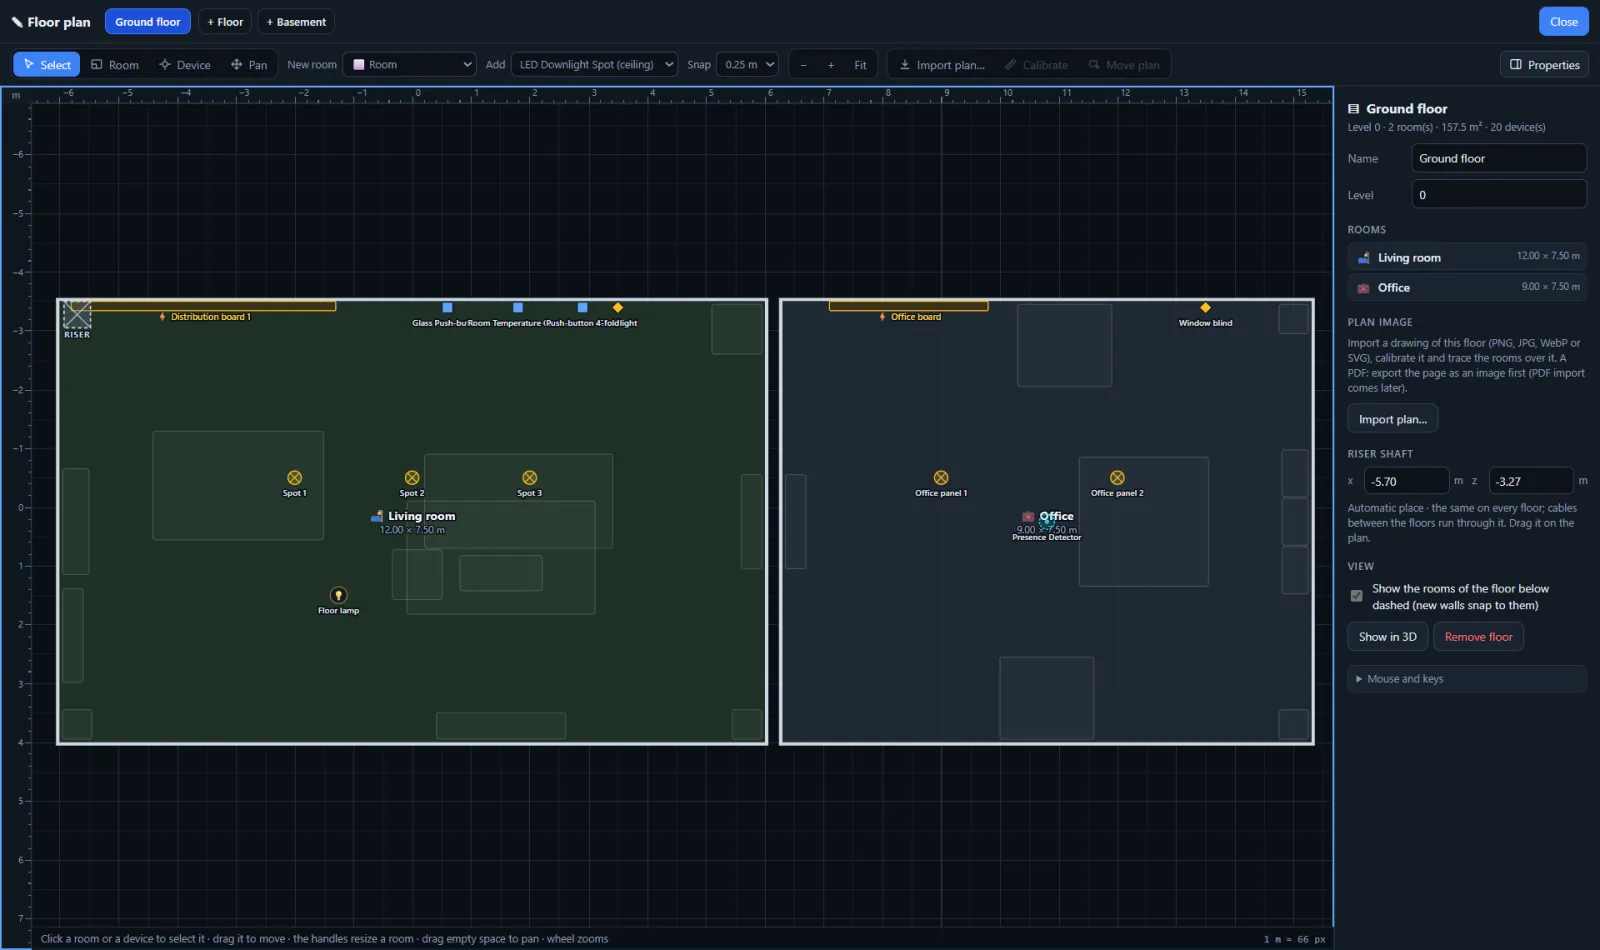
From a floor plan to a building you can walk through.
Documentation included
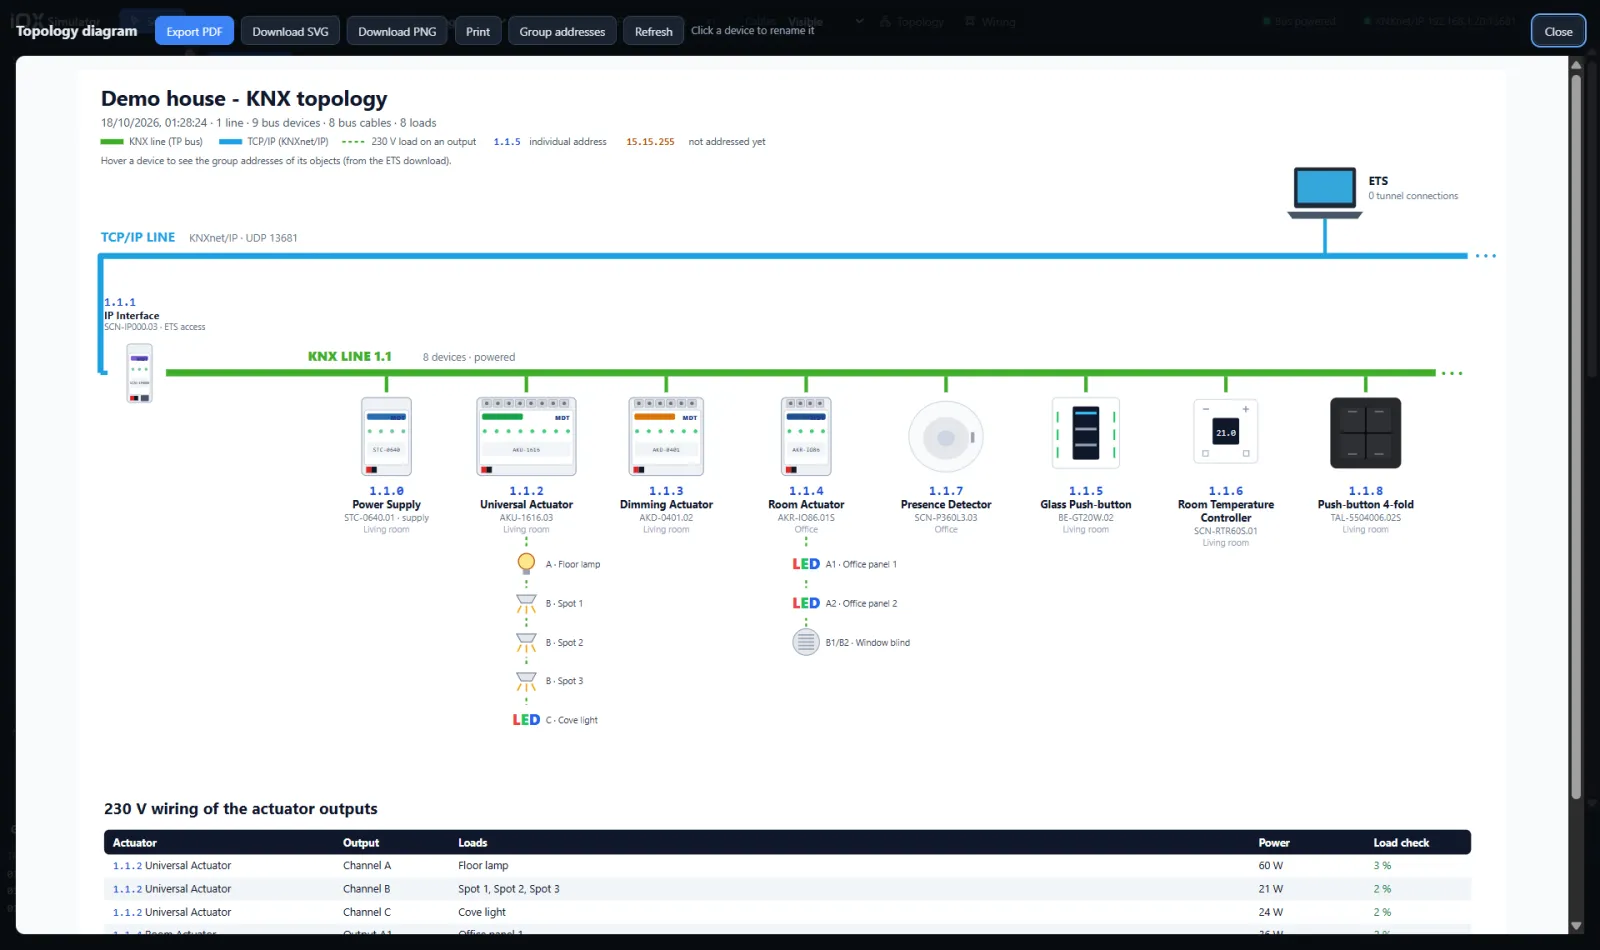
The topology draws itself.
The KNX topology diagram is generated from what you built: the TCP/IP line with ETS, the KNX line with every device in cable order, its individual address and room, the 230 V loads under each actuator, and the wiring and load table.
- Topology and wiring diagrams, always up to date
- Export as PDF, SVG or PNG, or print
Who it is for
For anyone who works with KNX.
Integrators and electricians
Test the ETS project — addresses, group addresses, parameters — and find mistakes at the desk, before you go to site.
Trainers and schools
Every student gets a full installation on a laptop, with faults to find: an open or shorted bus cable, an overloaded output, wrong wiring.
Sales and demos
Show a client a lit-up house that reacts to the push-buttons, before anything is installed.
KNX tool developers
A safe KNXnet/IP target for tunnelling, routing and the group monitor.
Everything in version 1.0
What is in the box.
ETS connection
- KNXnet/IP discovery, tunnelling (up to 8) and routing
- Individual address programming with the PROG button
- Application download, parameters read back from device memory
- Group monitor, group value read and write
- Point-to-point connection for device-info tools
MDT devices
- Power supply STC-0640.01, IP interface SCN-IP000.03, IP router SCN-IP100.03
- Line coupler SCN-LK001.03S, logic module SCN-LOG1.03S
- Universal actuator AKU-1616.03, room actuator AKR-IO86.01S, dimming actuator AKD-0401.02
- Glass Push-button II Smart BE-GT20W.02, push-button TAL-5504006.02S
- Room temperature controller SCN-RTR60S.01, presence detector SCN-P360L3.03
Loads and physics
- Lamps, spots, LED panels and strips, fan, socket, fan-coil unit, blinds
- A person to walk in front of detectors
- 230 V wiring with breakers and busbars; overload and short-circuit alarms
- Bus voltage drop, cable faults, couplers and routers with filter tables
Build and document
- Floors, basements, rooms, furniture, panels with DIN rails
- Floor plan editor with plan import, walk mode and mini-map
- Topology and wiring diagrams — PDF, SVG, PNG
- Project save and load
Getting started
From request to running.
Request a licence
Send the form below. We reply with the price, payment details and your licence key.
Install and activate
Run the Windows installer and activate your key online. The app tells you when an update is ready.
Build, then connect ETS
Start from the demo house or your own floor plan, then pick IOX Simulator as the connection in ETS.
Licence
Licence · Price on request
A licence key, activated online and tied to your PC. The number of PCs and the licence period are set per licence — tell us what you need and we send the price, payment details and your key.
What you need
- A Windows PC — ETS can run on the same PC or on another one in the network
- ETS with its own licence from the KNX Association — not included
- An internet connection to activate and verify the licence
- For application download, the device's ETS product database imported into the simulator
Questions
Answered.
Do I need any real KNX hardware?
No. The power supply, lines, IP interface and devices are all simulated, and ETS reaches them over your network.
Which devices are included?
MDT devices, today: power supply, IP interface and router, line coupler, logic module, universal, room and dimming actuators, push-buttons, room temperature controller and presence detector. Each is simulated from its ETS application and technical manual; a few functions, such as slat angle, are not modelled yet.
Does it replace testing on site?
No. It lets you test a project before you install it and find mistakes at your desk. Final testing still happens on the real installation.
Is ETS included?
No. ETS needs its own licence from the KNX Association. IOX Simulator works with the ETS you already have.
How does the licence work?
You get a licence key that is activated online and tied to your PC. The number of PCs and the licence period are set per licence, and the app needs an internet connection to verify it.
IOX Simulator
Request a licence.
Tell us who it is for and how many seats you need. We reply with the price, payment details and your licence key — usually within one business day.